Deploy Your Hugo Blog to Cloudflare Workers: A Complete Guide
A comprehensive guide to deploying your Hugo static site to Cloudflare Workers for lightning-fast, globally distributed hosting.
If you’re running a Hugo blog and want blazing-fast, serverless, and cost-effective hosting, Cloudflare Workers is an excellent choice. This combination gives you a fully static, globally distributed website with edge computing capabilities — all without managing servers.
In this comprehensive guide, you’ll learn how to deploy your Hugo blog to Cloudflare Workers, from initial setup to going live with your site.
Note: While Hugo can be deployed to Cloudflare Pages, Cloudflare now recommends using Workers for new projects due to enhanced performance and features. Check out the Cloudflare Pages to Workers migration guide for more details.
Why Choose Cloudflare Workers for Hugo?
Before diving into the setup, here’s why this combination is powerful:
- Global Edge Network: Your site is served from 300+ locations worldwide
- Lightning Fast: Sub-100ms response times globally
- Generous Free Tier: 100,000 requests per day for free
- Zero Cold Starts: Unlike traditional serverless, Workers start instantly
- Built-in CDN: Automatic caching and optimization
- Custom Domains: Easy SSL and domain management
Prerequisites
Before starting, ensure you have:
- A GitHub account
- A Cloudflare account (free tier works)
- Basic command line knowledge
- Git installed on your machine
Step 1: Install Hugo
First, let’s get Hugo installed on your system:
Linux/macOS (via Homebrew)
1
brew install hugo
Linux (via Snap)
1
sudo snap install hugo --channel=extended
Windows (via Chocolatey)
1
choco install hugo-extended
Verify Installation
1
2
hugo version
# Should output something like: hugo v0.148.1+extended
Tip: Always use the extended version of Hugo as it includes additional features like SCSS processing that many themes require.
Step 2: Create Your Hugo Project
Initialize a New Site
1
2
hugo new site my-hugo-blog
cd my-hugo-blog
This creates the standard Hugo directory structure:
1
2
3
4
5
6
7
8
9
10
my-hugo-blog/
├── archetypes/     # Content templates
├── assets/         # Assets to be processed
├── content/        # Your blog posts and pages
├── data/           # Data files
├── hugo.toml       # Main configuration file
├── i18n/           # Translation files
├── layouts/        # Custom templates
├── static/         # Static files (images, etc.)
└── themes/         # Hugo themes
Add a Theme
Choose a theme from https://themes.gohugo.io. For this example, we’ll use the popular Ananke theme:
1
2
3
4
5
6
7
8
# Initialize git repository
git init

# Add theme as submodule
git submodule add https://github.com/theNewDynamic/gohugo-theme-ananke themes/ananke

# Configure theme in hugo.toml
echo "theme = 'ananke'" >> hugo.toml
Create Your First Post
1
hugo new posts/my-first-post.md
Edit the generated file in content/posts/my-first-post.md:
1
2
3
4
5
6
7
8
9
10
11
12
13
14
---
title: "My First Post"
date: 2025-01-20T10:00:00Z
draft: false
---

Welcome to my new Hugo blog! This is my first post deployed to Cloudflare Workers.

## Why I Chose Hugo + Cloudflare Workers

- Fast static site generation
- Global edge distribution
- Excellent developer experience
- Cost-effective hosting
Test Locally
1
hugo serve
Your blog will be available at http://localhost:1313. Press Ctrl+C to stop the server.
Step 3: Prepare for Deployment
Push to GitHub
-
Create a new repository on GitHub (let’s call it
my-hugo-blog) -
Push your local content:
1
2
3
4
git add .
git commit -m "Initial Hugo blog setup"
git remote add origin https://github.com/YOUR_USERNAME/my-hugo-blog.git
git push -u origin main
Step 4: Configure Cloudflare Workers
Now we need to add the necessary configuration files for Cloudflare Workers.
Create wrangler.toml
Create a wrangler.toml file in your project root:
1
2
3
4
5
6
7
8
9
10
11
12
13
14
15
# wrangler.toml
name = "my-hugo-blog"
compatibility_date = "2025-01-20"

[build]
command = "./build.sh"

[assets]
directory = "./public"
not_found_handling = "404-page"

# Optional: Custom domain configuration
# [route]
# pattern = "yourdomain.com/*"
# zone_name = "yourdomain.com"
Create Build Script
Create a build.sh file in your project root:
1
2
3
4
5
6
7
8
9
10
11
12
13
14
15
16
17
18
19
20
21
22
23
24
25
26
27
28
29
30
31
32
33
34
35
36
37
38
39
40
41
#!/usr/bin/env bash

# Build script for Hugo on Cloudflare Workers
set -euo pipefail

main() {
    HUGO_VERSION="0.148.1"
    export TZ=UTC

    echo "🚀 Starting Hugo build process..."

    # Install Hugo
    echo "📦 Installing Hugo v${HUGO_VERSION}..."
    curl -LJO "https://github.com/gohugoio/hugo/releases/download/v${HUGO_VERSION}/hugo_extended_${HUGO_VERSION}_linux-amd64.tar.gz"
    tar -xf "hugo_extended_${HUGO_VERSION}_linux-amd64.tar.gz"
    cp hugo /opt/buildhome/
    rm LICENSE README.md "hugo_extended_${HUGO_VERSION}_linux-amd64.tar.gz"

    # Set PATH
    echo "🔧 Configuring environment..."
    export PATH="/opt/buildhome:$PATH"

    # Initialize submodules (for themes)
    echo "🎨 Setting up themes..."
    git submodule update --init --recursive
    git config core.quotepath false

    # Verify installations
    echo "✅ Verifying installations..."
    echo "Hugo: $(hugo version)"
    echo "Node.js: $(node --version || echo 'Not available')"
    echo "Go: $(go version || echo 'Not available')"

    # Build the site
    echo "🔨 Building Hugo site..."
    hugo --gc --minify

    echo "✨ Build completed successfully!"
}

main "$@"
Make Build Script Executable
1
chmod +x build.sh
Commit Changes
1
2
3
git add .
git commit -m "Add Cloudflare Workers configuration"
git push origin main
Step 5: Deploy to Cloudflare Workers
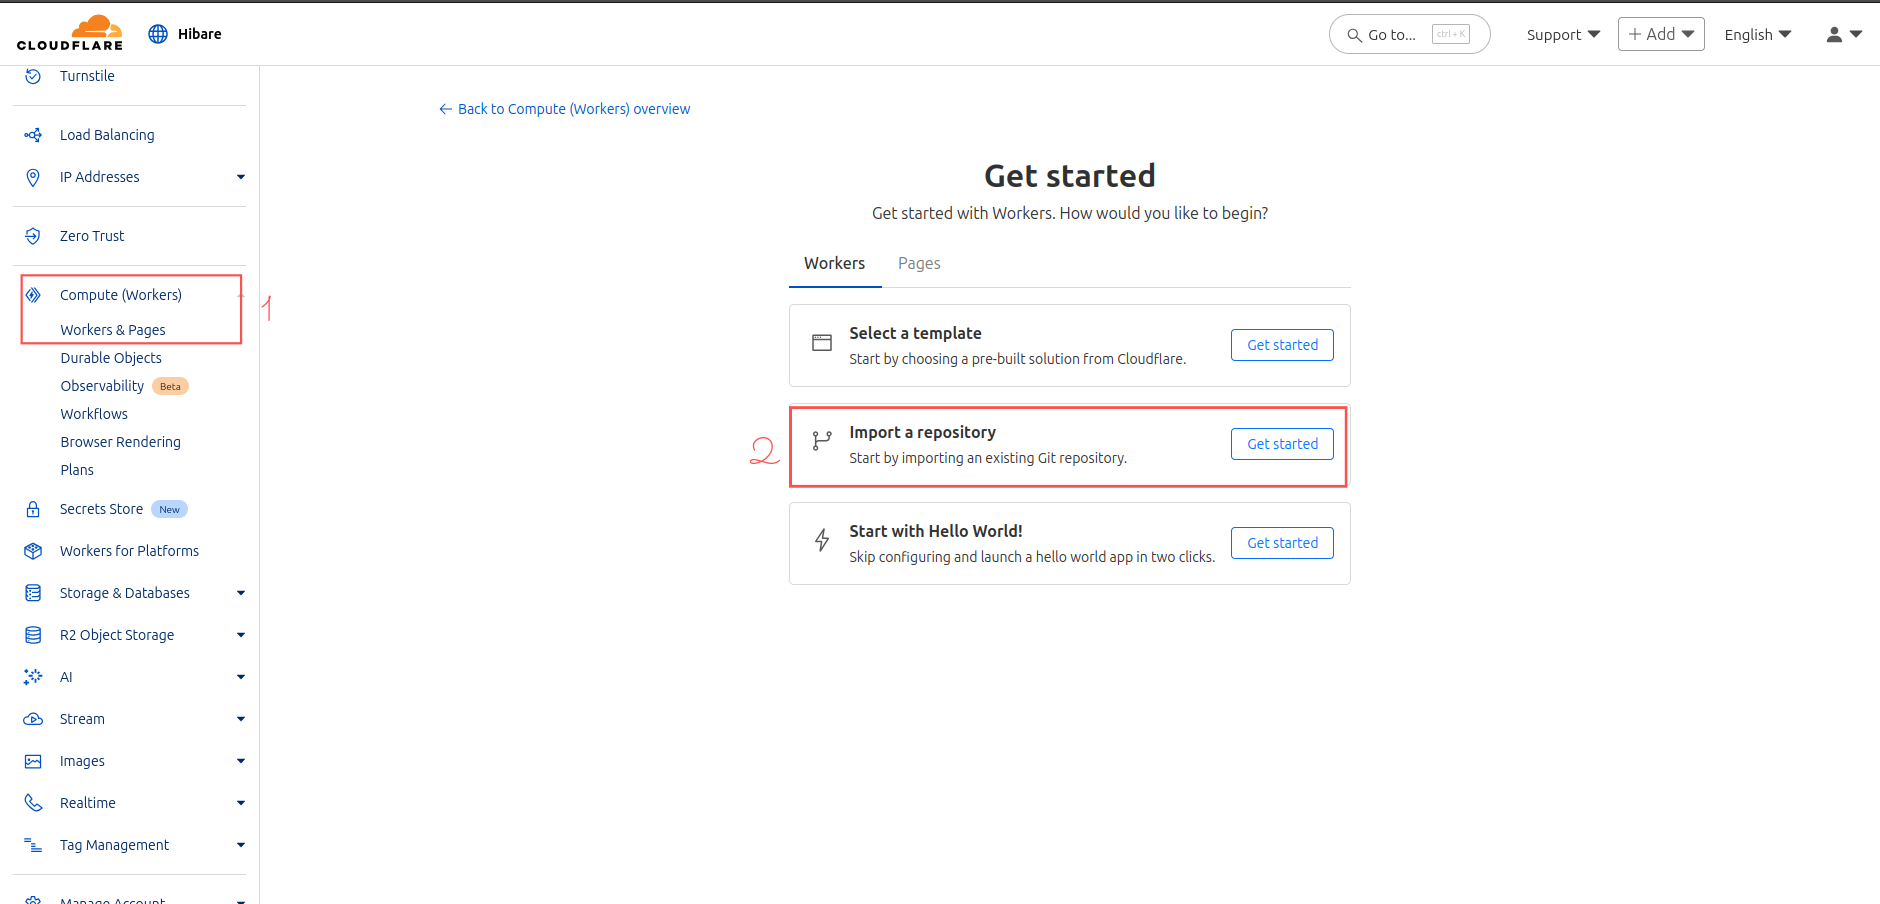
Access Cloudflare Dashboard
- Login to Cloudflare Dashboard
- Navigate to Workers & Pages from the sidebar
- Click Create Application
- Select Pages tab
- Click Connect to Git
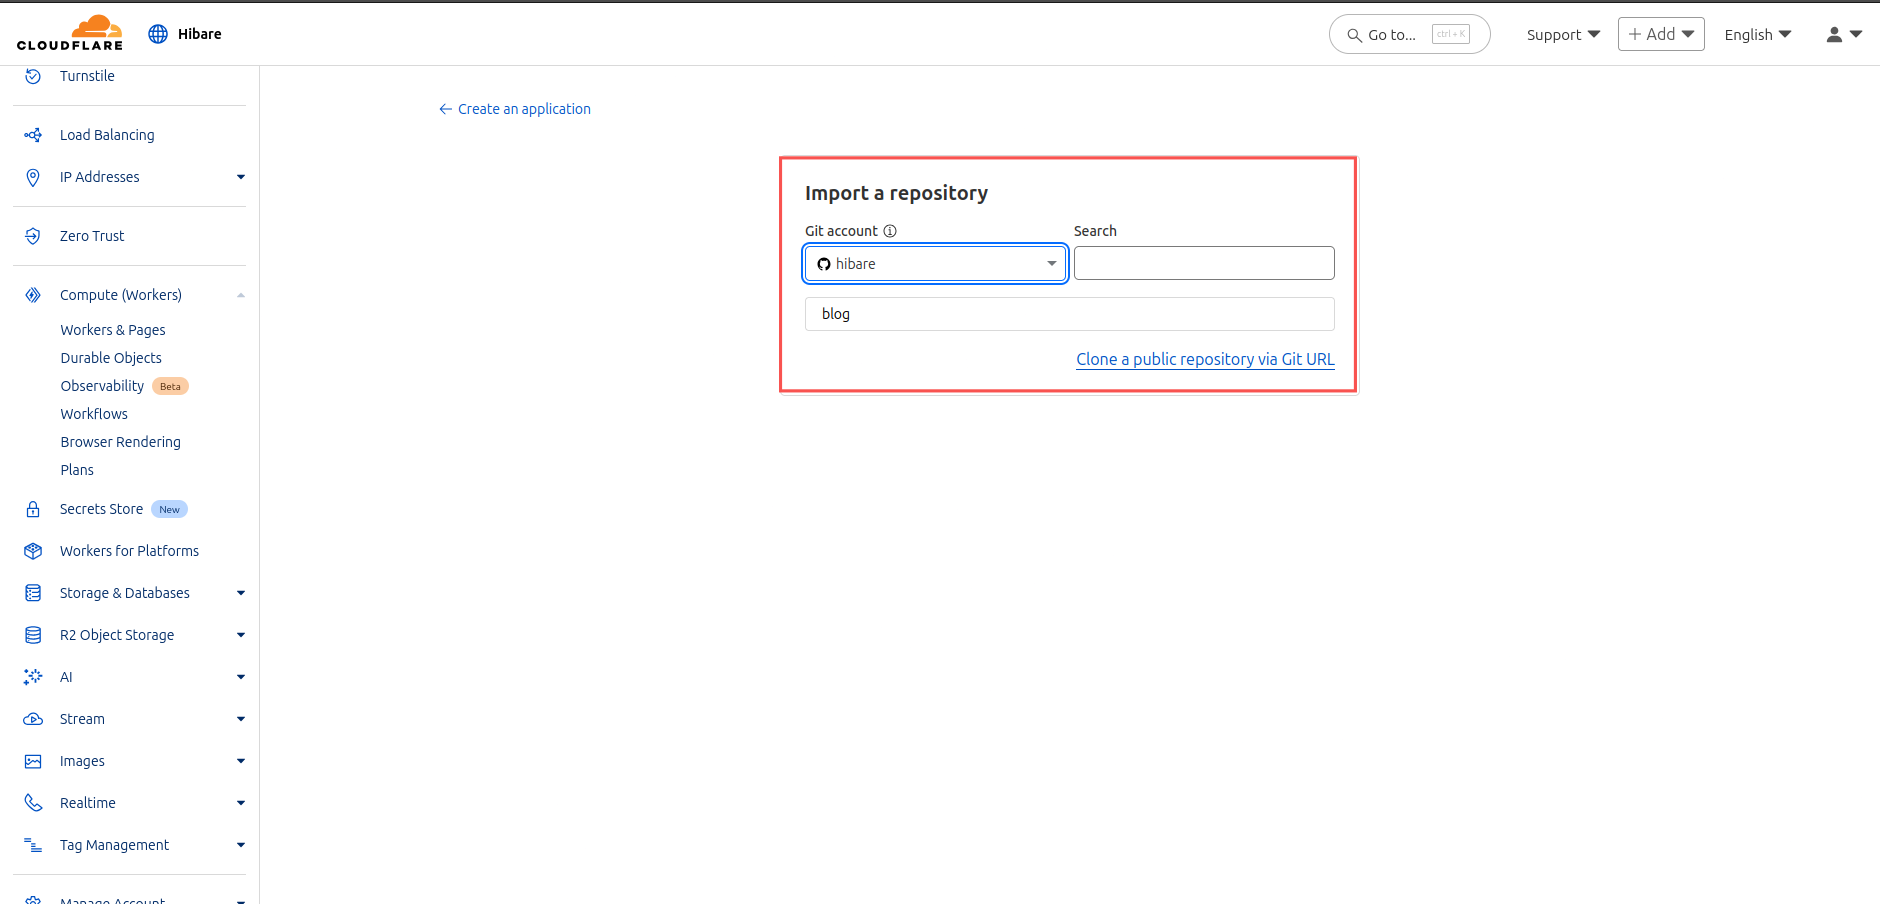
Connect Your Repository
-
Connect GitHub Account: If not already connected, authorize Cloudflare to access your GitHub repositories
-
Select Repository: Choose your
my-hugo-blogrepository
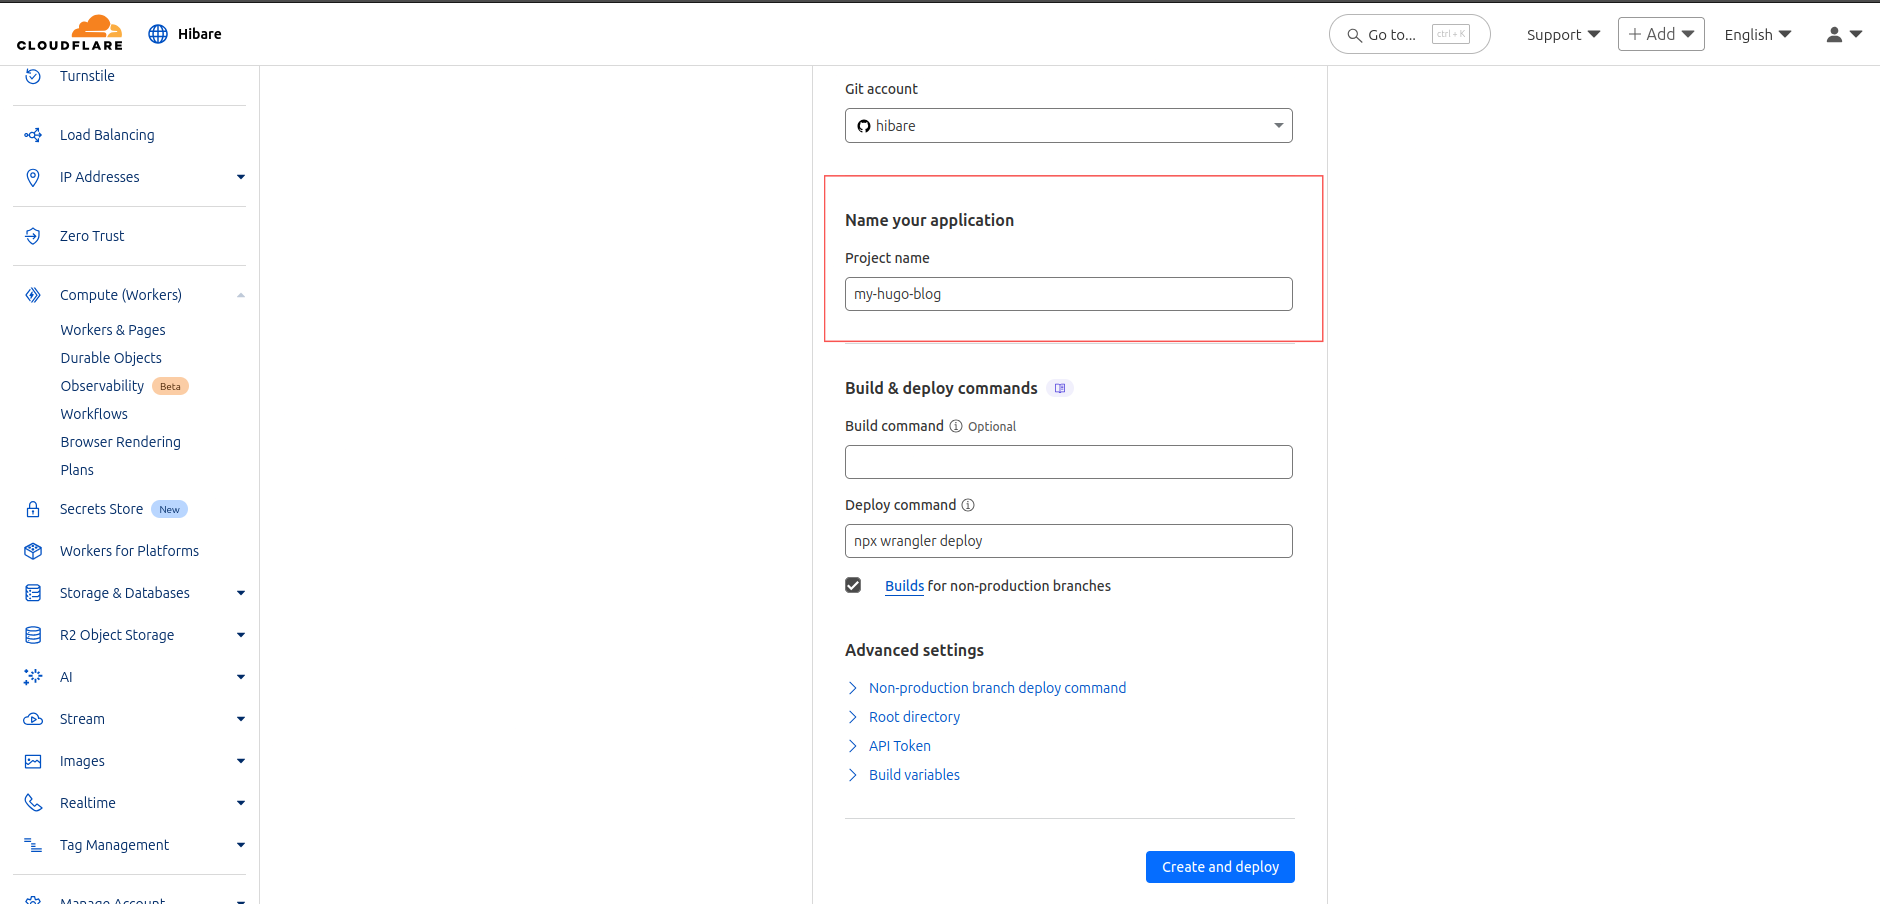
Configure Deployment Settings
- Project Name: Enter
my-hugo-blog(must match thenameinwrangler.toml) - Production Branch: Select
main - Build Settings:
- Framework preset:
None(we’re using custom build) - Build command:
./build.sh - Build output directory:
public
- Framework preset:
Deploy Your Site
- Click Save and Deploy
- Cloudflare will start building your site
- The build process typically takes 2-3 minutes
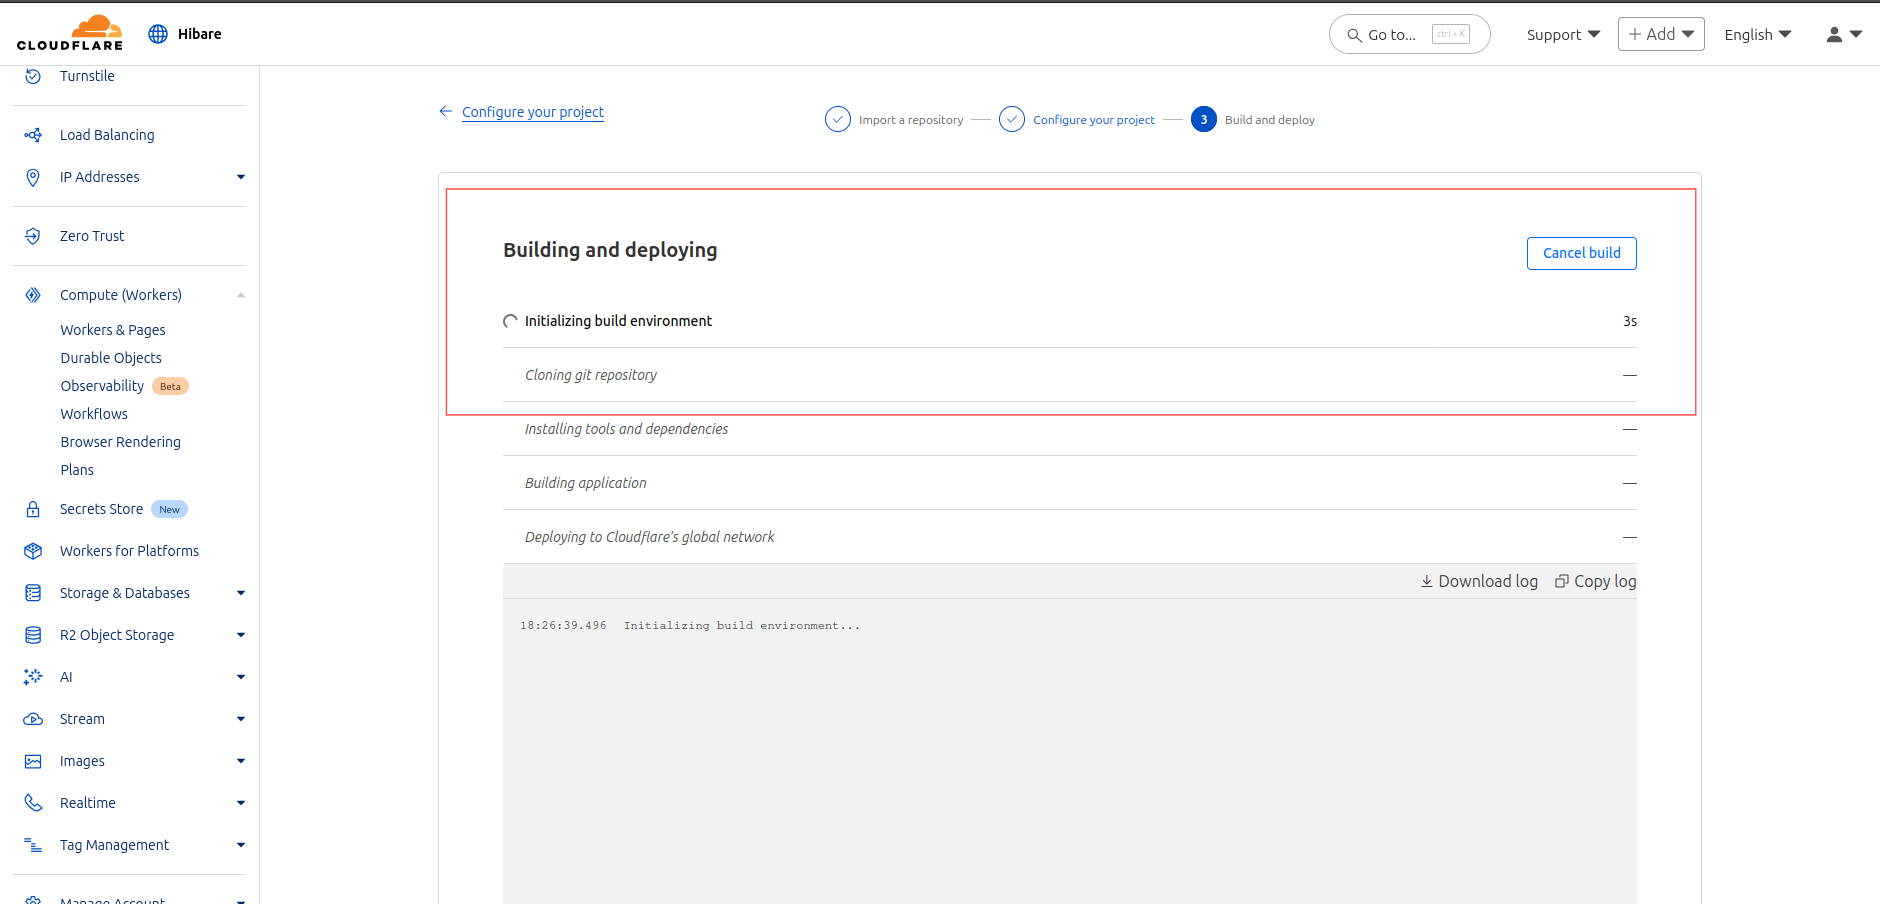
Deployment Complete
Once the build completes, you’ll see your live site URL:
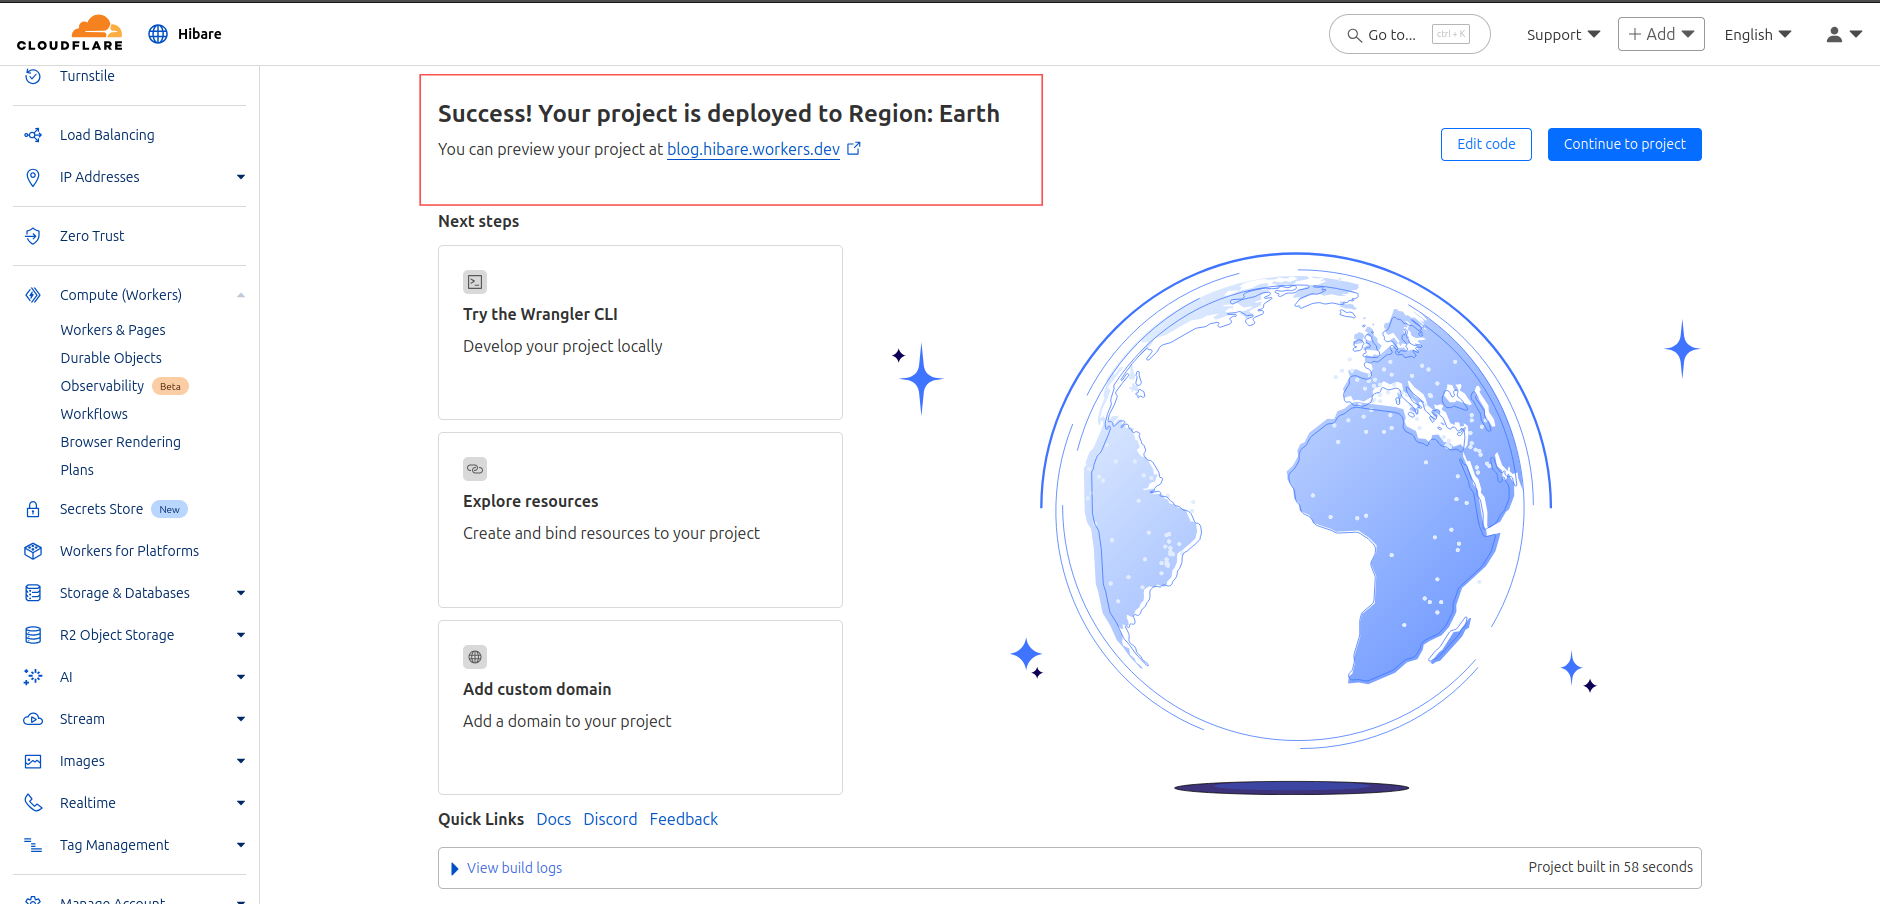
Your Hugo blog is now live on Cloudflare Workers! 🎉
Step 6: Custom Domain (Optional)
To use your own domain:
- Add Domain to Cloudflare:
- Go to Websites in Cloudflare Dashboard
- Add your domain and follow DNS setup instructions
- Configure Custom Domain:
- In your Workers project, go to Custom Domains
- Click Set up a custom domain
- Enter your domain name
- Cloudflare will automatically provision SSL certificates
- Update wrangler.toml (optional):
1
2
3
[route]
pattern = "yourdomain.com/*"
zone_name = "yourdomain.com"
Continuous Deployment
With this setup, your blog will automatically rebuild and redeploy whenever you:
- Push changes to your
mainbranch - Add new blog posts
- Update your theme or configuration
Adding New Posts
To add a new post:
1
2
3
4
5
6
7
8
9
10
# Create new post
hugo new posts/my-second-post.md

# Edit the post content
# Set draft: false when ready to publish

# Deploy
git add .
git commit -m "Add new blog post"
git push origin main
Troubleshooting
Common Issues and Solutions
Build Fails: “Hugo command not found”
- Ensure your
build.shscript has execute permissions - Check the Hugo version in the script matches current releases
Theme Not Loading
- Verify git submodules are properly initialized
- Check that
themeis correctly set inhugo.toml - Ensure theme files exist in
themes/directory
404 Errors on Subpages
- Verify
not_found_handling = "404-page"inwrangler.toml - Check that Hugo is generating pages correctly with
hugo servelocally
Build Takes Too Long
- Consider optimizing images and assets
- Review Hugo build configuration for unnecessary processing
Custom Domain Issues
- Ensure DNS records are correctly configured
- SSL certificates may take up to 24 hours to provision
Debugging Tips
-
Check Build Logs: Always review the build logs in Cloudflare Dashboard for specific error messages
-
Test Locally: Run
hugo servelocally to verify your site works before deploying -
Validate Configuration: Use
hugo configto check your site configuration
Security Considerations
Content Security Policy
Add CSP headers to enhance security:
1
2
3
# In wrangler.toml
[assets.header_rules]
"/*" = { "Content-Security-Policy" = "default-src 'self'; img-src 'self' data: https:; style-src 'self' 'unsafe-inline'" }
Environment Variables
For sensitive data, use Cloudflare Workers environment variables instead of committing them to your repository.
Monitoring and Analytics
Cloudflare Analytics
Cloudflare provides built-in analytics for your Workers site:
- Traffic metrics
- Performance data
- Security insights
- Geographic distribution
Third-party Analytics
You can easily add analytics services like:
- Google Analytics
- Plausible Analytics
- Fathom Analytics
Add the tracking code to your Hugo theme’s head partial.
Conclusion
Congratulations! You’ve successfully deployed your Hugo blog to Cloudflare Workers. This setup provides you with:
✅ Lightning-fast global delivery via Cloudflare’s edge network ✅ Automatic SSL certificates and security features ✅ Generous free tier with 100,000 requests per day ✅ Seamless continuous deployment from your Git repository ✅ Excellent performance with minimal configuration
Resources
Happy blogging! 🚀